Introduction
If you are using a standardized Cal Poly Smart Room, review this information.
Mac Connection to Art projectors - General Tips:
A. Our projectors cannot display the highest resolutions commonly found on the latest model computers. Users must turn down screen resolution to a level the projector can display, and that is also low enough for good audience viewing (the higher the resolution the smaller EVERYTHING appears on screen).
B. Set up and test your presentation (images, font sizes, etc.) for a common projector resolution:
- 1280 x 1024 (4x3)
- 1280 x 768 (16x10)
- 1280 x 720 (16x9)
- 1024 x 768 (4x3)
Maximum resolution for ceiling mounted projectors in Art & Design (Room 149, 150, 151):
- 1600 x 1200 (4x3)
C. Most presenters prefer to use the Mirrored Display option, so that the presenter sees exactly what the audience sees...without having to look up at the projected image.
Please review these steps to connect and use overhead projectors from a Mac.
-
-
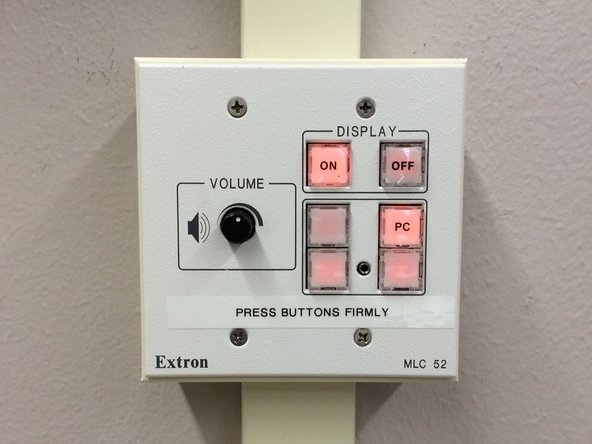
Locate VGA cable and the wall mounted Projector Controller Box, typically on the wall at the front of the room.
-
The VGA Cable is for video signal only. The Mini-RCA cable is for audio signal only. You can use either one, or both together.
-
-
-
If your presentation includes video, connect the VGA to Mini Display Port/Thunderbolt adapter and VGA cable to the Mac.
-
If your presentation includes audio, connect in the Mini-RCA cable to the Mac.
-
-
-
Turn on Projector: Push ON display button (button will flash while projector warms up, and remain lit when the projector is on).
-
Select Source: Push PC button to select the VGA/Thunderbolt adapter (button will light when selected.)
-
Adjust Audio: Rotate Volume knob to at least 50% (if you have audio in your presentation)
-
Audio Tip: Both the source computer and the control box can control volume; if either one is turned down to zero, there will be no audio!
-
-
-
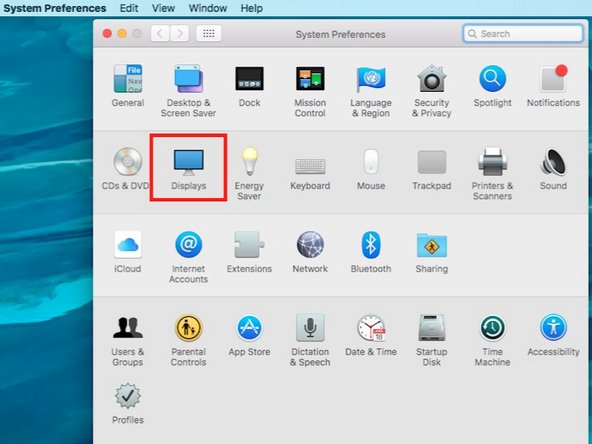
After the video cable is connected, open System Preferences and then the Displays Preference Pane on the Mac.
-
-
-
Select the Arrangement Tab at the top.
-
The Arrangement Tab will not be available unless a second monitor is plugged in and detected. Check the video connection if it us unavailable.
-
Check the Mirrored Display box to project the Mac desktop.
-
Mirroring AUTOMATICALLY matches the computer and projector resolution. The best resolution for the projector (and audience viewing) is often less than ideal on the computer; black bars or fuzzy screens on the computer are common.
-
-
-
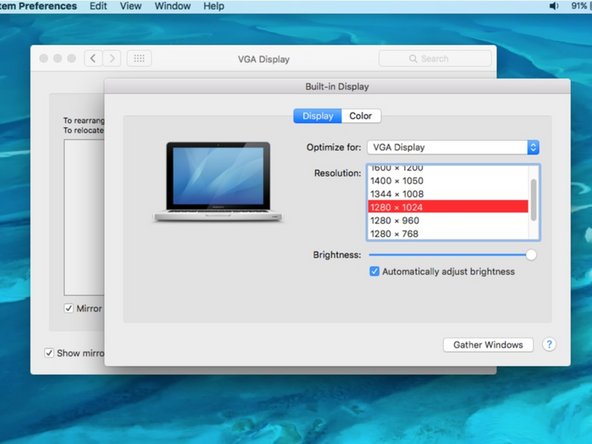
Select the Display tab, and choose a preferred projector resolution.
-
Video Tip: Try 1280 x 1024, or 1280 x 768. Some older projectors may require 1024 x 768.
-