Introduction
Follow these steps to print your 18" x 24" project on heavy-weight enhanced matte paper.
- Verify you have at least $6.00 of credit in PaperCut first.
- Paper is included in the price on this photo printer.
- Paper is roll-fed, so print size setup is flexible, but custom setup is required.
- This printer can print from several applications, but use Adobe Acrobat for the easiest and most consistent results for Graphic Design projects.
-
-
Log into a lab computer in 34-160A.
-
Transfer your PDF project file to print to the lab computer.
-
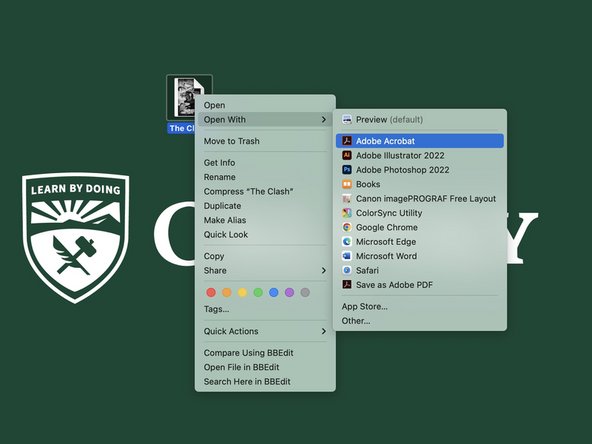
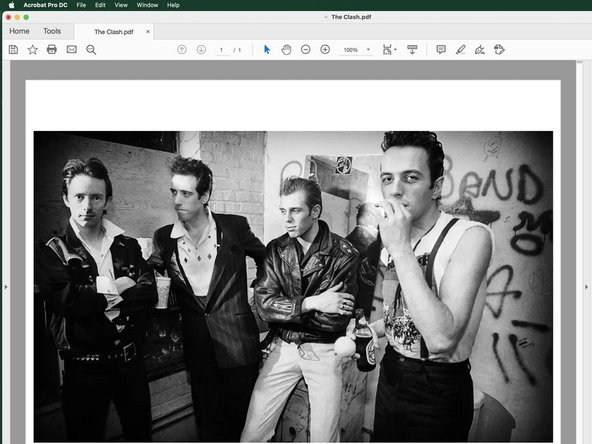
Open your PDF file with Adobe Acrobat (you will need to log into Adobe to authenticate).
-
The default Mac PDF viewer is Preview. Printing from Preview is not recommended, as it has less printing functionality, and it can cause unexpected color shifts in prints.
-
For this project: be sure to have at least $6.00 print credit available in your PaperCut account before proceeding.
-
-
-
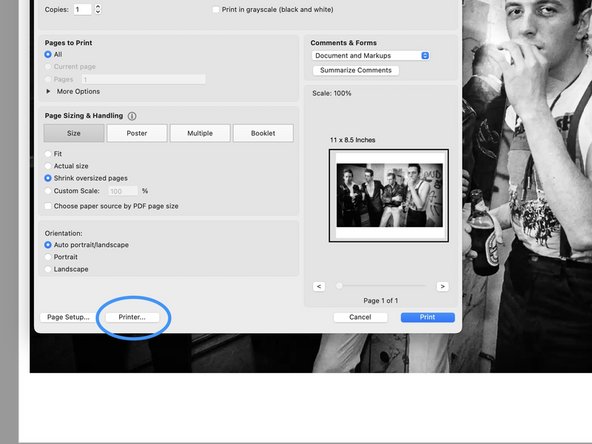
Select Print from the menubar to start the process.
-
At the top of the Print dialog box, Select/Verify the RC-Canon-Pro2000 printer.
-
-
-
Click the Page Setup... button.
-
In the Page Setup window, in the Format For field, select the RC-Canon -Pro2000 printer.
-
In the Paper Size drop down list, select Manage Custom Sizes at the bottom, and then select the + button to create a new custom size.
-
Set the Margins field to RC-Canon -Pro2000
-
Set Width: 24, and Height: 18. Verify the four margins are set at 0.12
-
This printer has 24" wide paper, and will automatically print sideways (landscape) with these settings which reduces cost and waste.
-
-
-
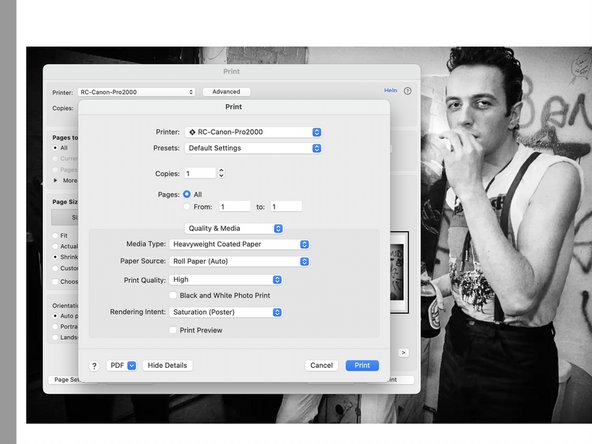
Click on the Printer... button.
-
In the Print window, click on the Layout option in the middle of the page, and select Quality & Media.
-
Verify the Media Type, Paper Source, Print Quality, and Rendering Intent match these settings.
-
When done in the Quality & Media area, click the Print button to return to the main print window.
-
The Quality and Media settings shown above are for the default paper (Heavywheight Enhanced Matte). While other paper may be used, settings will vary to match both the paper and ICC color profiles.
-
-
-
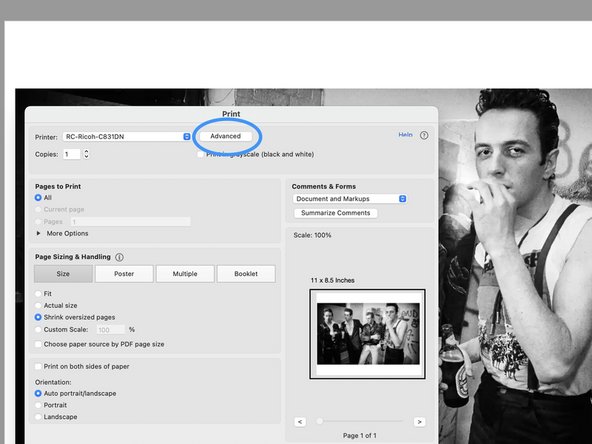
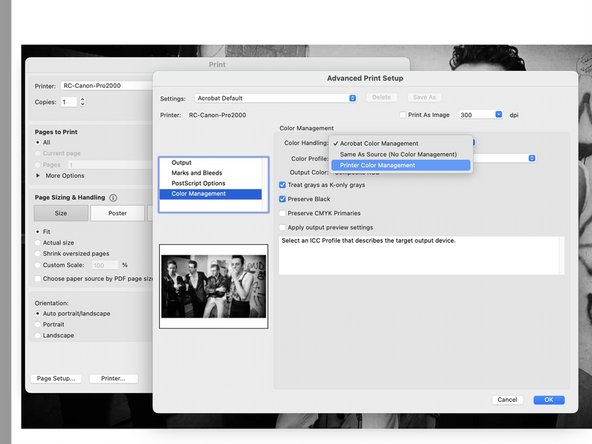
Click on the Advanced at the top of the main Print window.
-
On the left side of the window, click on Color Management. Change the Color Handling option to Printer Color Management.
-
Click OK to return to the main Print menu.
-
-
-
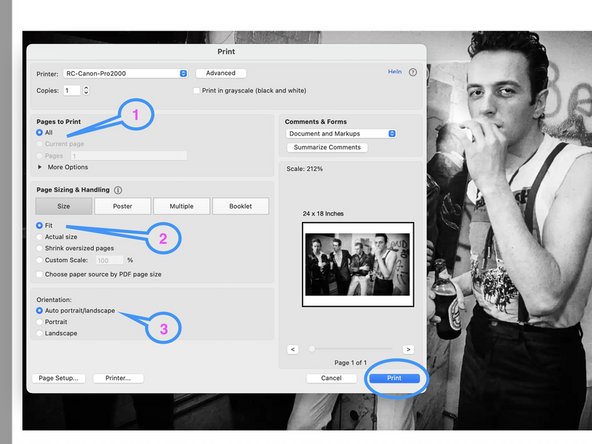
Verify the general settings are correct:
-
1 - Number of Pages: Printing pages individually is best for large formats, to minimize reprints and waste.
-
2 - Size: Verify image size. If the original file is exactly 18" x 24", then the default setting of Fit should be perfect, showing the entire image with the 1/8" margin (0.12 in.)
-
If the original file is NOT exactly 18" x 24", the Custom Scale option can be used to shrink/enlarge the image to best fit the paper and margin requirements. Click in any other field to refresh the preview image.
-
3 - Orientation: If the custom paper size is correct (24" wide x 18" high), the default Auto portrait/landscape setting will rotate the image to fit the paper correctly.
-
With the above settings verified, and if the preview image looks correct, click Print to send the job to the printer.
-