
Introduction
Art & Design students can print from their own computers to:
* Xerox in Building 21-206
* Kyocera in Building 34-149
* Kyocera in Building 34-150
This process has limitations compared to direct printing, so review these before proceeding.
Web Print Limitations:
- File format: PDF only
- Jobs will automatically print letter, in portrait direction
- User cannot select Bypass tray for custom paper
- User cannot select two-sided printing
- User cannot make printer related adjustments (print quality, page range, color profile selection, scaling image size, etc.)
To verify you are ready to Web Print, review these requirements and preliminary steps.
Web Print Requirements:
- You already have an activated PaperCut account
- You have an adequate PaperCut balance to cover the cost of the web prints
- '''Setup your original document to the required size: Letter (8.5 x 11) portrait direction
- You have saved your file as a PDF
In some situations, it may be best to send individual pages as single print jobs.
Tools
Parts
No parts specified.
-
-
Confirm your device is connected to Cal Poly's eduroam network with good signal strength.
-
PaperCut web printers are only available via a direct network connection on campus. A privacy VPN, proxy, or other security/privacy options may block access, and the web print pages will NOT load.
-
-
-
Open a browser and enter or copy over the web print URL.
-
Log in with your Cal Poly credentials.
-
If the browser gives a security warning, click approve or continue to the site.
-
If the page times out or gives an error, check to see if your device is configured to use a wifi hotspot, VPN, proxy, or other security tool. Privacy tools or settings must be disabled before a connection can be established.
-
-
-
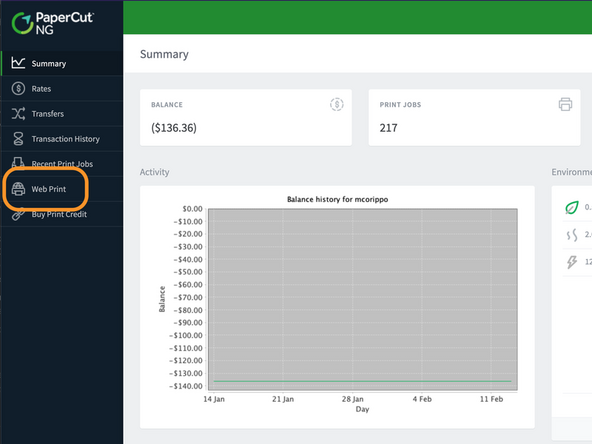
From the Summary page, click on Web Print in the left column.
-
-
-
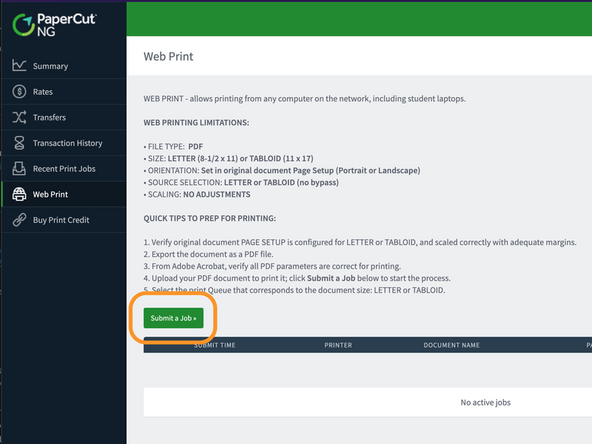
Review the details and limitations on this page, and then click the Submit a Print Job button.
-
-
-
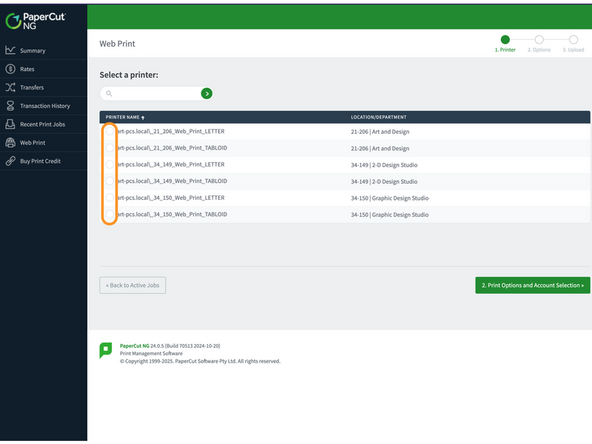
Select the correct print workflow.
-
Verify you are connecting to the correct printer. Connecting to the wrong printer will result in printing to the wrong room, and could disrupt a class.
-
Click on the Print Options and Account Selection button to proceed.
-
-
-
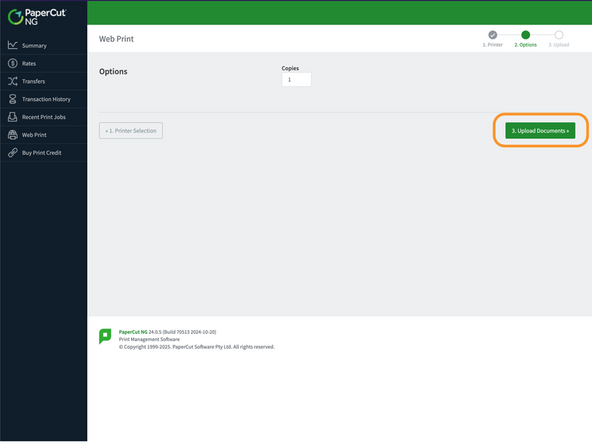
Verify or set the number of prints (default is 1 copy), and click the Upload Documents button.
-
-
-
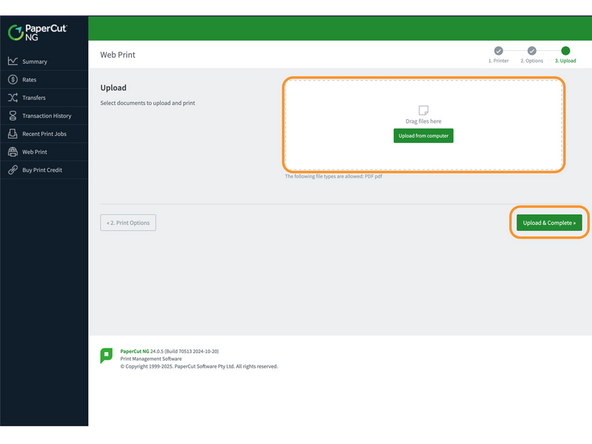
Drag your PDF to the upload box, and click the Upload & Complete button to print the document.
-
Once complete, the status will show Finished, and the total charged from your PaperCut account balance will be displayed.
-


Cancel: I did not complete this guide.
One other person completed this guide.
